


G4 Owner’s Manual – 14b – Packing The Reserve Parachute
Helpful Hint
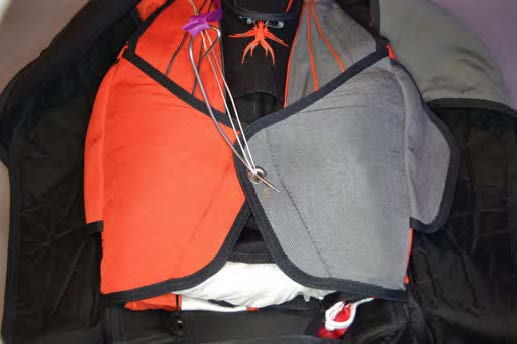
Place your knee or foot on the center of the No. 1 flap and apply pressure while pulling up on the No. 4 and No. 5 reserve container side flaps. Work the canopy into the corners of the container and away from the closing loop.
This is important for bulk distribution and proper pilot chute seating.
Fold the remaining bridle across the No. 1 flap:
Without the Trap System – Distribute the bulk evenly
With the Trap System – Distribute the bulk more to the non-Trap side.
Helpful Hint
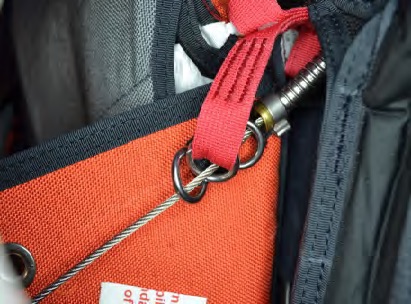
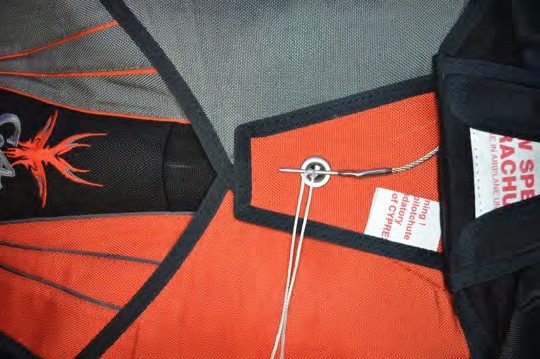
A long wire bodkin or rifle cleaning rod is helpful for the next step.
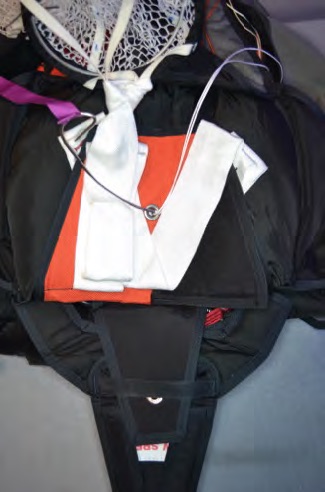
Thread the long pull-up cord through the reserve pilot chute base and out through the grommet in the top of the pilot chute.
If an AAD is to be installed on a Mirage built after 2004, the use of a Mirage reserve pilot chute with a concave top is mandatory.
Older flat top Mirage pilot chutes are authorized on earlier Mirages but the modern concave top is recommended.
CAUTION!
Make sure that the pull-up cord passes through the center of the pilot chute spring and does not pass around or through any part of the spring, the bridle, or the netting.
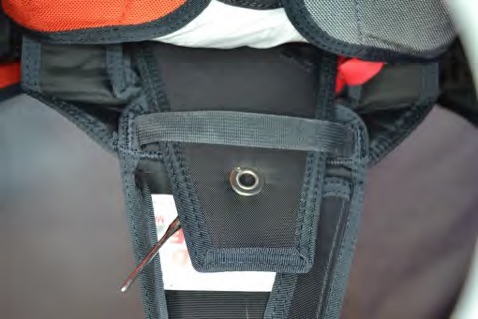
Center the base of the pilot chute spring over the grommet in the No. 1 flap while folding the bridle away from the grommet. Make sure that none of the bridle is near the closing loop.
Compress the pilot chute spring. Due to the strength of the pilot chute spring, it is best to collapse the spring coils by starting at the bottom and pushing a single coil down, alternating left or right, until all are completely collapsed.
DO NOT wrap any part of the pilot chute canopy or mesh around the spring!
Helpful Hint
A packing paddle or leverage tool attached to the pull-up cord is required for the next step.
While pushing down on the pilot chute to keep it compressed, remove the temporary packing pin from the No. 1 flap, pull the closing loop through the grommet in the top of the pilot chute, and reinsert the temporary packing pin in the closing loop above the pilot chute. Note that the top of the reserve pilot chute is numbered 2.
If the closing loop is the correct length, the coils of the pilot chute spring should not wobble excessively when the pilot chute is compressed.
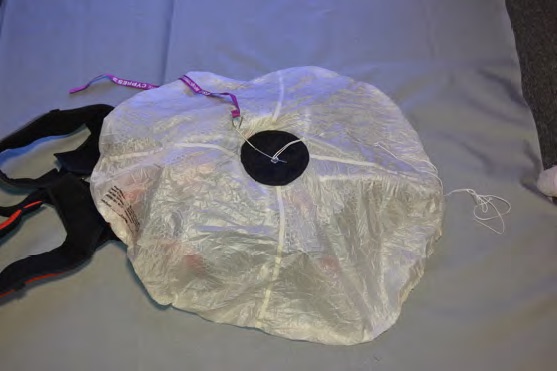
Gently pull on the pilot chute canopy to spread it and the mesh to their full diameter.
IMPORTANT – Make sure that all canopy fabric and mesh are withdrawn from within the coils of the pilot chute spring.
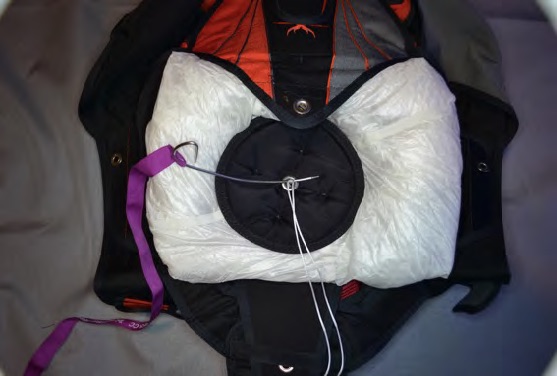
Place your knee or foot on the center of the pilot chute top and apply pressure while pulling up on the No. 4 and No. 5 reserve container side flaps. Work the pilot chute into the packed bag, and work the canopy into the corners of the container.
Filling the corners completely is very important for bulk distribution and proper pilot chute seating.
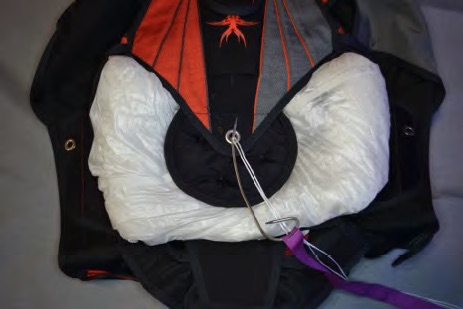
Accordion fold the pilot chute canopy under from the top and under from the bottom until the parallel edges of both folds are approximately 1-1/2” to 2” from the edge of the pilot chute top.
CAUTION!
DO NOT place any portion of the folded canopy and mesh under or in the spring.
DO NOT place any portion of the folded canopy and mesh around or under the bag.
IMPORTANT – The pilot chute canopy and mesh should always remain on top of the bag and NOT BE wrapped alongside, around or under it in such a way as to hinder its launch.
Thread the pull-up cord through the hole in the AAD cutter assembly (if installed), then through the grommet on the No. 3 flap.
IMPORTANT!
Double check to make sure the pull-up cord passes through the hole in the AAD cutter assembly (if installed).
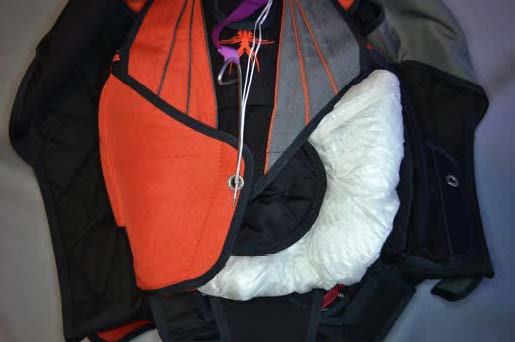
Wrap the ends of the folded pilot chute around the pilot chute top and place them under the No. 3 flap with the ends facing the bottom of the container. Again, make sure that none of the canopy or mesh is placed under or in the pilot chute spring. Also, make sure that none of the canopy or mesh is tucked or wrapped around or under the bag; no canopy or mesh should be between the bag and the sides of the container.
CAUTION!
If an AAD is installed, avoid using excessive force on top of the reserve pilot chute when closing the No. 3, 4, 5, and 6 flaps.
Do not use a closing plate smaller than the diameter of the pilot chute cap on top of these flaps.
Damage to the AAD cutter could result!
Using a packing paddle or leverage tool attached to the pull-up cord, draw the grommet in the No. 3 flap to the grommet in the pilot chute by pulling toward the top of the reserve container.
Don’t remove the temporary packing pin until the two grommets are touching.
Pull the closing loop through the grommet in the No. 3 flap and reinsert the temporary packing pin in the closing loop above the No. 3 flap.
Once the No. 3 flap is pinned, check the coils of the pilot chute to make sure that they are aligned and centered under the No. 3 flap grommet.
Thread the pull-up cord through the grommets in both the No. 4 and No. 5 flaps.
Using a packing paddle or leverage tool attached to the pull-up cord, draw both grommets toward the center.
Do not remove the temporary packing pin above the No. 3 flap.
While drawing the No. 4 and No. 5 flaps together, firmly slap the side walls of the reserve container to expel air and nudge the flaps closer together.
IMPORTANT!
Do not force either of the side flaps to the center. Work gradually to prevent damage to the reserve container.
Drawing both flaps to the center at the same time will help keep the reserve container symmetrical.
Once the flaps have been drawn to the center over the closing loop, withdraw the pull-up cord from the No. 5 flap, while keeping tension on the pull-up cord through the No. 4 flap.
Remove the temporary packing pin from the No. 3 flap.
Using a packing paddle or leverage tool attached to the pull-up cord, draw the closing loop through the No. 4 flap grommet and reinsert the temporary packing pin in the closing loop above the No. 4 grommet.
Thread the pull-up cord through the grommet in the No. 5 flap.
Using a packing paddle or leverage tool attached to the pull-up cord, draw the closing loop through the No. 5 flap grommet and reinsert the temporary packing pin in the closing loop above the flap.
Note
At this point it should require maximum effort to draw no more than 1/4” of the closing loop beyond the No. 5 flap.
If installed, make sure that the reserve ripcord passes through the first RSL guide ring on the No. 6 flap, then through the RSL ring, then through the second guide ring.
Insert the No. 6 flap and ripcord pin through the retaining loop on the reserve pin cover flap.
Thread the pull-up cord through the grommet in the No. 6 flap.
Using a packing paddle or leverage tool attached to the pull-up cord, draw the closing loop through the No. 6 flap grommet and insert the ripcord pin in the closing loop above the flap.
IMPORTANT!
Measure the force required to move the ripcord pin to verify that it takes less than the required maximum of 22 lbs.
Inspect and account for all tools used.
Seal the ripcord pin with 5 lb. seal thread in accordance with The Parachute Manual and complete the packing data card.
Close the reserve pin cover.