


G4 Owner’s Manual – 14a – Packing The Reserve Parachute
Riggers are to use standard rigging practices, techniques and tools in packing a Mirage reserve container. No special tools are required, other than a long pull-up cord, 60” (+/-) long. Refer to the information provided in this manual as a guide. If you have any questions, contact Mirage Systems, Inc.
Note
The use of a ratcheting closing tool is discouraged. Ratcheting closing tools can exert excessive force which can weaken or break the reserve container closing loop, damage reserve flap grommets, and possibly damage the AAD cutter. If you do use a ratcheting closing tool, do so carefully.
Lay the Mirage and reserve parachute canopy out for packing, face down and head toward the canopy.
When the canopy inspection and line continuity check are completed, fold the canopy according to the canopy manufacturer’s instructions. The PRO packing method, or a BASE canopy type PRO packing method, is recommended.
When folding is complete, ensure that all suspension and steering lines are in the center of the folded canopy on top of the center cell, and that half of the canopy is folded to the right of the lines, and half of the canopy is folded to the left of the lines.
Long fold the canopy slightly wider than the closing flap of the reserve deployment bag and stow the slider as recommended by the canopy manufacturer.
Fold the slider and grommets back making an S-fold 3” to 6” top to bottom. The slider grommets should now be located at the bottom edge of the folded canopy.
The second S-fold brings the canopy stack down over the first S-fold even and even with the bottom edge.
The length of the second S-fold will depend upon the available space between the bottom of the deployment bag and the closing loop grommet in the bag, but should be about 4” to 6” overall.
This second fold should begin to create the desired wedge shape of the reserve container. The majority of the canopy bulk should now be at the bottom of the stack. This will end up in the bottom of the reserve bag, between the opening and the closing loop grommet.
For the next step, it may be helpful to have your knees against the bottom edge of the stacked canopy.
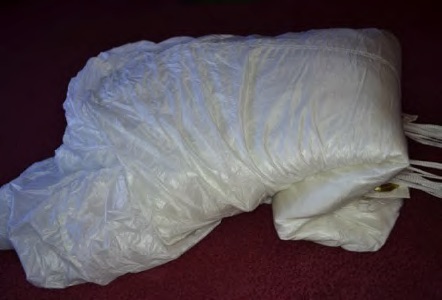
Spread the two sides of the remaining folded canopy apart slightly and locate the center seam. Follow the center seam toward the center cell intake, clearing the seam as you go, until the center cell intake is located. Fold the intakes left and right away from the center seam and gently roll the center seam down toward the floor, forming the folded canopy into a molar shape.
Unlike the G3, the G4 requires somewhat thicker molar ears in order to fill the top of the reserve container. Fold the molar ears under 5” to 8” .
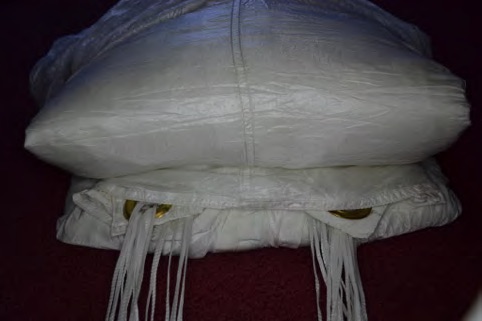
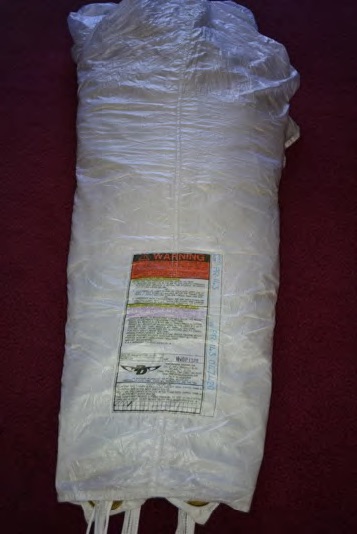
Slide the deployment bag under the folded canopy and place your knees on the edge of the bag closing flap. Open the bag with one hand and with the other hand, slide one side of the folded canopy into the bag. Repeat for the other side.
IMPORTANT – Fill the top of the bag as full as possible.
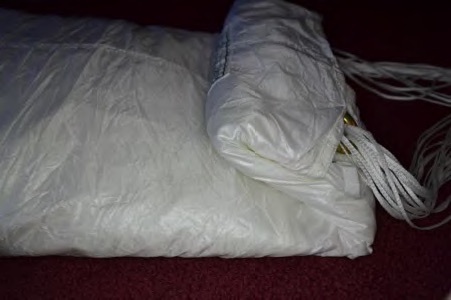
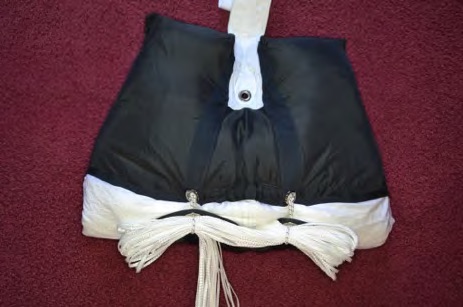
Close the bag opening by making two locking stows, left or right,with the suspension lines.
Micro-line stows should be 2” long (+/-), and Dacron line stows should be 3” long (+/-).
When the locking stows are completed, ensure that the zig-zag stitching on the safety stow is centered in the retention channel.
CAUTION!
Prior to stowing the suspension lines, always cover the hook velcro located inside the reserve deployment bag line stow pocket by attaching temporary pile velcro strips. Hook velcro can cause damage to the reserve canopy suspension lines. Remove temporary velcro after suspension lines are stowed.
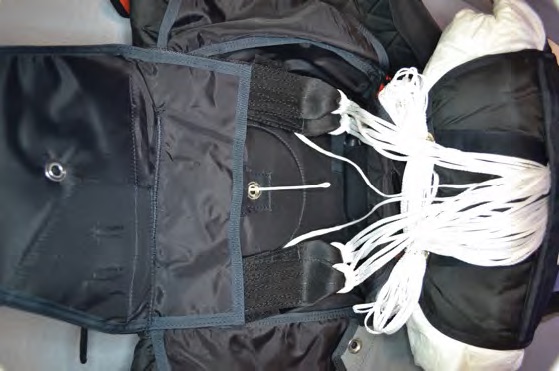
Stand the bag on the floor with the closing flap up. S-fold the remainder of the suspension lines in the line stow pocket, starting in the bottom corners, left or right. Continue left or right until 4” (+/-) of the suspension lines remain outside the pocket. To reduce line bulk, evenly distribute the lines within the pocket.
Remove the temporary pile velcro and mate the velcro strips on the line stow pocket, making sure that no suspension lines are trapped between the two velcro halves.
While the bag is still standing with the closing flap up, use your hand to compress the packed canopy at the center of the closing flap. This will make a space for the AAD when the bag is placed in the reserve container.
Install a 60” (+/-) long pull-up cord through the reserve container closing loop.
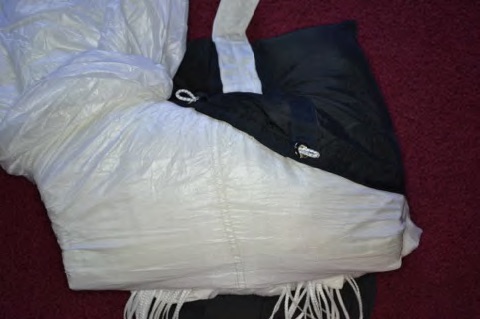
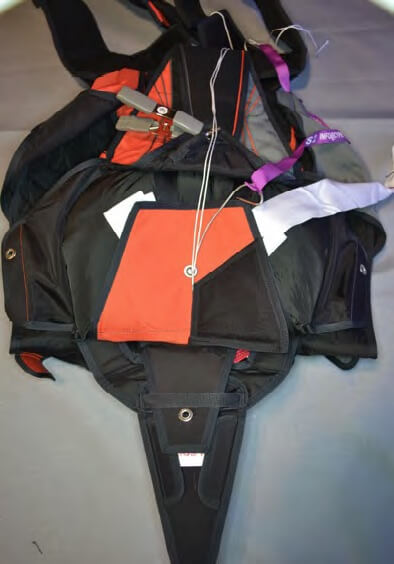
Lift the packed bag toward the reserve container and place the risers into the reserve container. Make sure not to twist or rotate the bag. Spread out the four risers side-by-side across the bottom of the reserve container. Neatly organize the 4” to 6” of slack suspension lines between the bag and risers.
Lay the reserve bag in the container and thread the pull-up cord through the grommet in the bag.
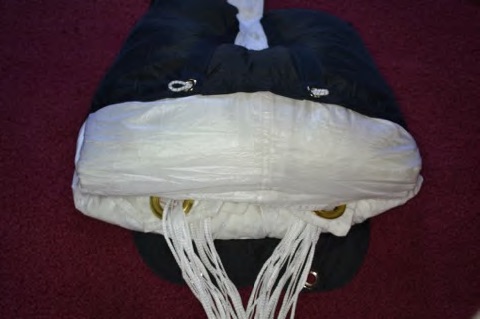
Place your knee on the center of the bag to keep it in place while you push the bag into the corners of the reserve container, filling the corners.
With both hands, press inward on the bottom center of the bag to make room for the AAD while pushing the bag downward into the corners of the reserve container.

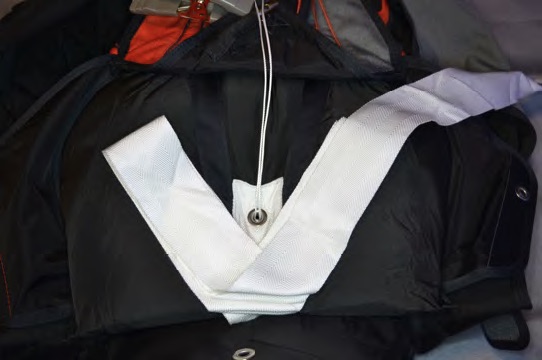
Starting at the bridle attachment point on the bag, V-fold the bridle as shown, removing any twists in the bridle.
Fold all but 3’ to 4’ of the bridle in this manner.
Bridle folds should be evenly distributed to the left and right of the closing loop grommet.
Thread the long pull-up cord through the grommet in the No. 1 flap and close the flap over the folded bridle.
Make sure the folded bridle is kept away from the grommets.
The remaining 3’ to 4’ of bridle should exit from under the bottom edge of the No. 1 flap, left or right of the grommet.
Helpful Hint
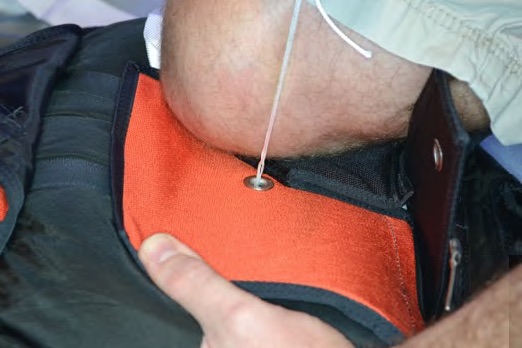
At this point, the proper closing loop length can be verified before the reserve container is closed.
- Push down on the No. 1 flap and the packed bag with one hand, and pull up with maximum effort on the long pull-up cord with the other. If the closing loop is the correct length, you should be able to pull 3/4” to 1” of the loop past the No. 1 flap.
- If a length adjustment is needed, fold the No. 1 flap back and reach under the packed bag inside the reserve container to pull the closing loop disc and knot from under the retaining elastic and out the top of the reserve container. This can be done without disturbing the risers or packed parachute.
- Make the length adjustment needed, then use the still attached pull-up cord to return the closing loop to the reserve container. Make sure the disc is reseated on the grommet under the retaining elastic. Recheck the closing loop length in the same manner.
- Pin the closing loop through the No. 1 flap with a temporary packing pin.